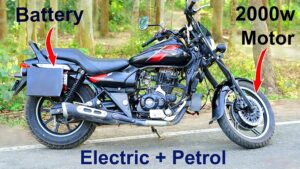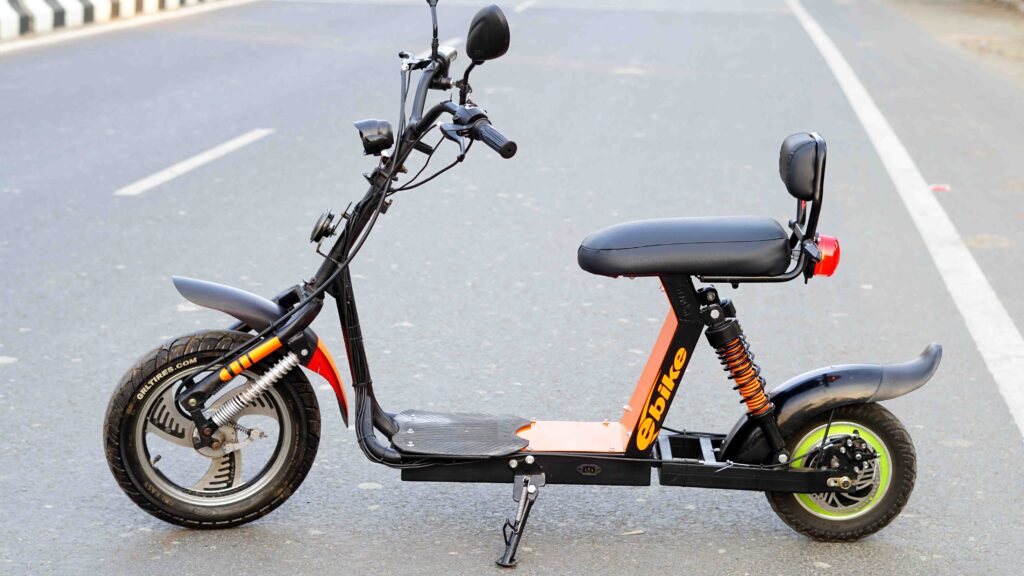
Electric vehicles are loved by everyone. Electric vehicles are not lagging behind to compete equally with petrol powered cars. The demand for electric vehicles is increasing as fuel consumption is very low. Two-wheeled vehicles play a major role in daily life. If such an electric scooter can be made at home at a lower cost than the market price, then it is very convenient. Keeping these things in mind, I have shown you how to make an electric scooter at home in a simple way for everyone’s benefit. It is made at a much lower cost than the price of electric scooters available in the market.
What materials are needed to make the vehicle, how much it costs, how it is made, everything is discussed in details below.
Parts and Materials:
Some of the parts and materials I needed to make this particular electric scooter were purchased from the market and some from online. I collected some parts from the old scooter. I discussed these materials in detail below.
Electric Bike Conversion Kit:
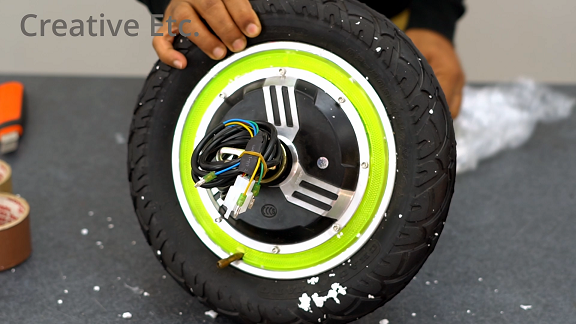
The electric bike conversion kit plays the most important role in making two-wheeled electric vehicles. In this kit there are two wheels included , one of those was wheel hub motor . This motor is 48 volt 350 watt BL DC hub motor. Including tire its diameter is 12 inches. It is a high torqued motor, whose speed can go up to 35 km/h .In this kit there is 48v ,350watt controller and throttle. The throttle is used for speed control. I bought this conversion kit from motorkit.in for Rs 12500.
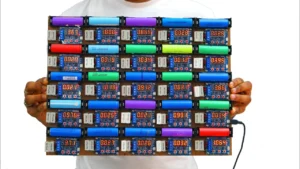
Battery Pack:
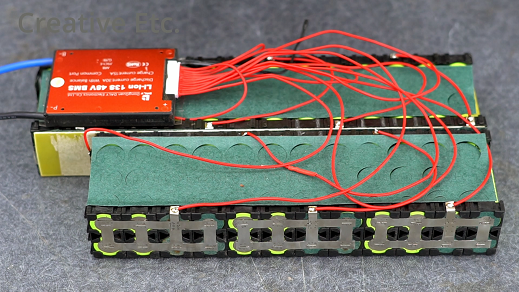
The battery pack used in the electric scooter is made up of 52 lithium ion battery cells. A pack is made by connecting four battery cells in parallel and total of 13 such packs are added in series to form the Total Battery Pack. Each battery cell is 4.2 volts and 2.7Ah. Since every four batteries are connected in parallel connection , in that case the voltage of each pack is 4.2 but its amperes will be (2.74)=10.8Ah and since such 13 parrallel batteries are connected in series connection the voltage of the total battery pack will be (4.213)=54.6V . Total cost of Rs 8000 rupees has been spent to make it.I bought battery cell and BMS from arbaccessories.in .
Parts of Old Scooter:
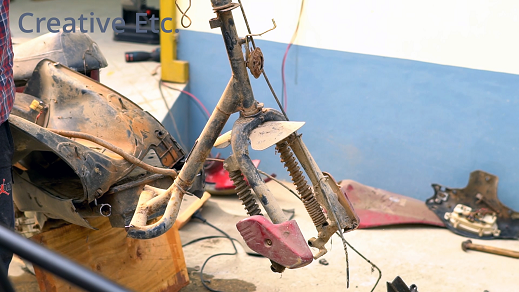
In making this electric scooter I used the front part from an old scooter. Which included fork, front wheel, shocker, and handle.
Iron Pipe and Sheet:
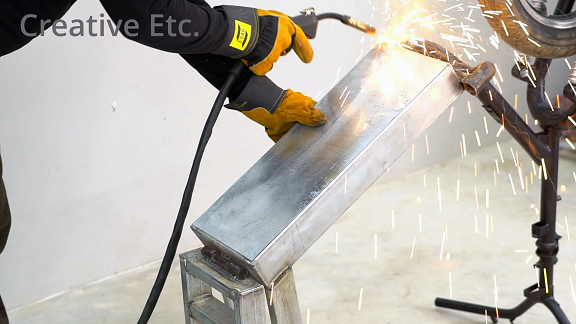
The chassis of the scooter is made of iron rectangular pipes. I bought such pipes for 100 rupees per kg. A total of 5 kg of pipe is required, which costs Rs.500. Here I used (1×2.5) inch rectangular pipe to make the middle part of the chassis and (1×1.5) inch rectangular pipe to make the suspension and 1.2 mm iron sheet is used to cover it.
Bicycle Disc Break:

For the rear wheel of this scooter I have used a bicycle disc brake, which is bought from the local market, it costs 500 rupees. It would have been much more effective to use a bike or scooter disc brake instead of a bicycle disc brake, but in that case the cost would have been much higher and the fitting would have been complicated.
Homemade Seat:
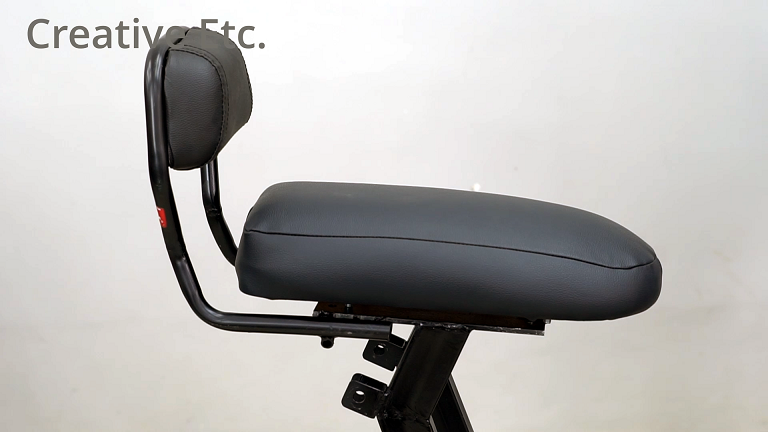
I made the seat of the bike at home with sponge. In that case, 200 rupees were spent. The price of the back rest which is installed for sitting and leaning back is 800 rupees.
Back Light and Indicator Light:

I bought the back light used in the scooter for 300 rupees from the local market. And the indicator light used was bought from the local market for 200 rupees as a pair.
Shocker of rear Wheel:
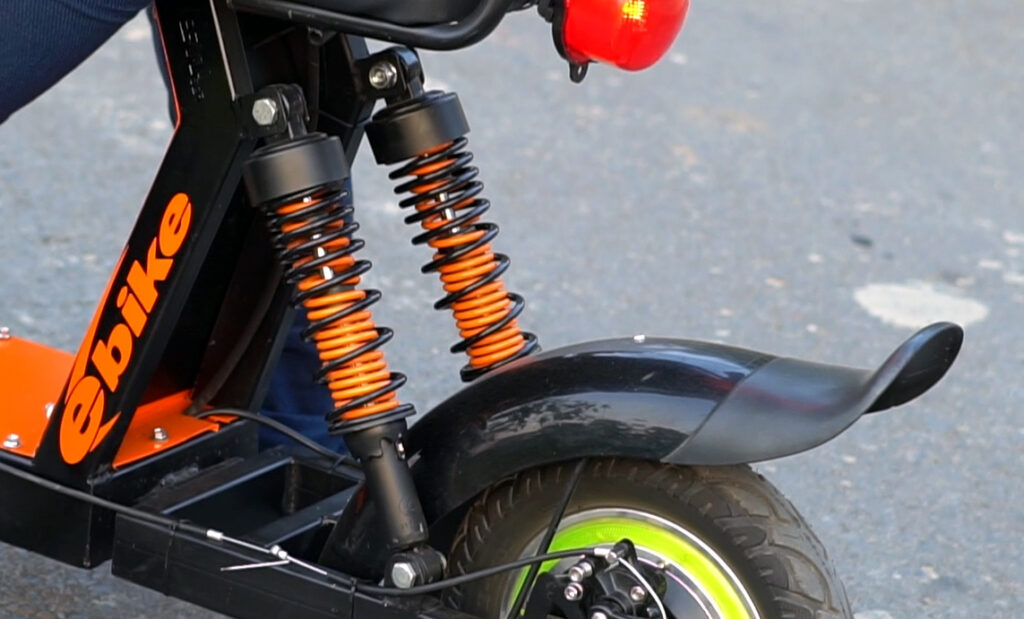
The shocker used in the rear wheel of the vehicle was purchased from a local bike servicing shop. They are also available online. I bought it for Rs 1500 as a pair.
Mudguards:
I could not find such a mudguard in the market which is suitable for the wheels of this scooter. Then I showed some creativity in making the mudguard. I brought two spare mudguards from the bike servicing shop and cut them according to the required shape and used them.
Spray Color:
The color used in the vehicle is a type of spray color. I bought each bottle for Rs 120 . Two such bottles have to be used to paint this scooter.
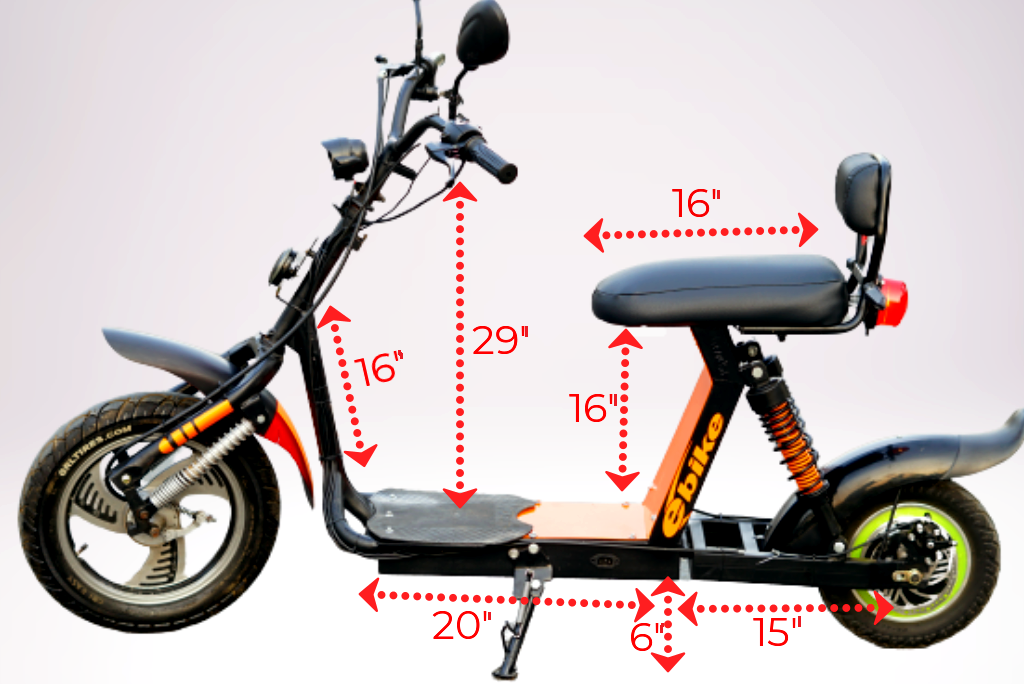
Dimentions:
How to Make:
The vehicle is built in a simple manner. First, we made the middle part of the chassis with a rectangular pipe. Then the rear suspension was made and fitted with the middle part. Handle, fork and wheel were removed from the old scooter. The old color was removed by applying color remover to these parts and added to the middle part of the chassis. I put the rear wheel and the disc brake on it properly. In the portion where the seat will be fitted, I made it with rectangular pipe. then I fit the seat on it which I made with sponge. We set the battery pack in the middle of the chassis, and cut the iron sheet to the right size to cover the top and loar side of the chassis. I set the controller on the side of the battery and fixed the cover with screws, so that it can be opened if necessary. Then I painted it as desired. Headlight, indicator light, front brake, throttle and back rest have been installed. I cut the two abandoned mudguards into suitable shapes and fitted them. To give a professional look to the vehicle, a sticker written e-bike has been added.
Speed & Millage:
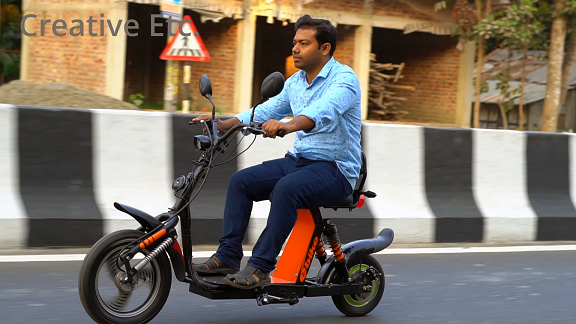
I have practically got a high speed of up to 35 km on this scooter and it can travel 35 km on a single charge.
Cost of Making:
The cost of buying the parts and materials for making the scooter is mentioned while discussing about those materials or parts. Below is a list of the cost of purchasing those materials.
Motor kit – Rs 12500/-
Iron Sheet – Rs 400/-
Iron pipe – Rs 500/-
Battery – Rs 8000 /-
Disc brake – Rs 500/-
Shocker – Rs 1500/-
Seat – Rs 1000/-
Indicator +back light – Rs 600/-
Head light + horn – Rs 400/-
old scooter – Rs 1000/-
Others – Rs 1600/-
The total making cost is Rs 28000 /-
Advantage and Disadvantage of The Scooter:
This homemade electric scooter is simply amazing. Since this vehicle is completely self-made, it attracts people’s attention when driving this model on the road. A child can also sit in the back seat with the driver. The vehicle can carry a load of 100 kg.
Despite these advantages, tall people may find it difficult to drive this model because it is a little low. If the seat is a little higher, it would be very convenient for them to drive.
Materials and machine link:
You can get the all motor kit from — https://motorkit.in/48v-350watt-bldc-…
Welding Machine – https://amzn.to/3ovkyTG
Paint Remover spray – https://amzn.to/3HByUKr
Angle Grinder – https://amzn.to/3lguCAQ
Bench Drill Machine – https://amzn.to/3FO36SF
Li-ion 48V Battery – https://amzn.to/3JNHIOC