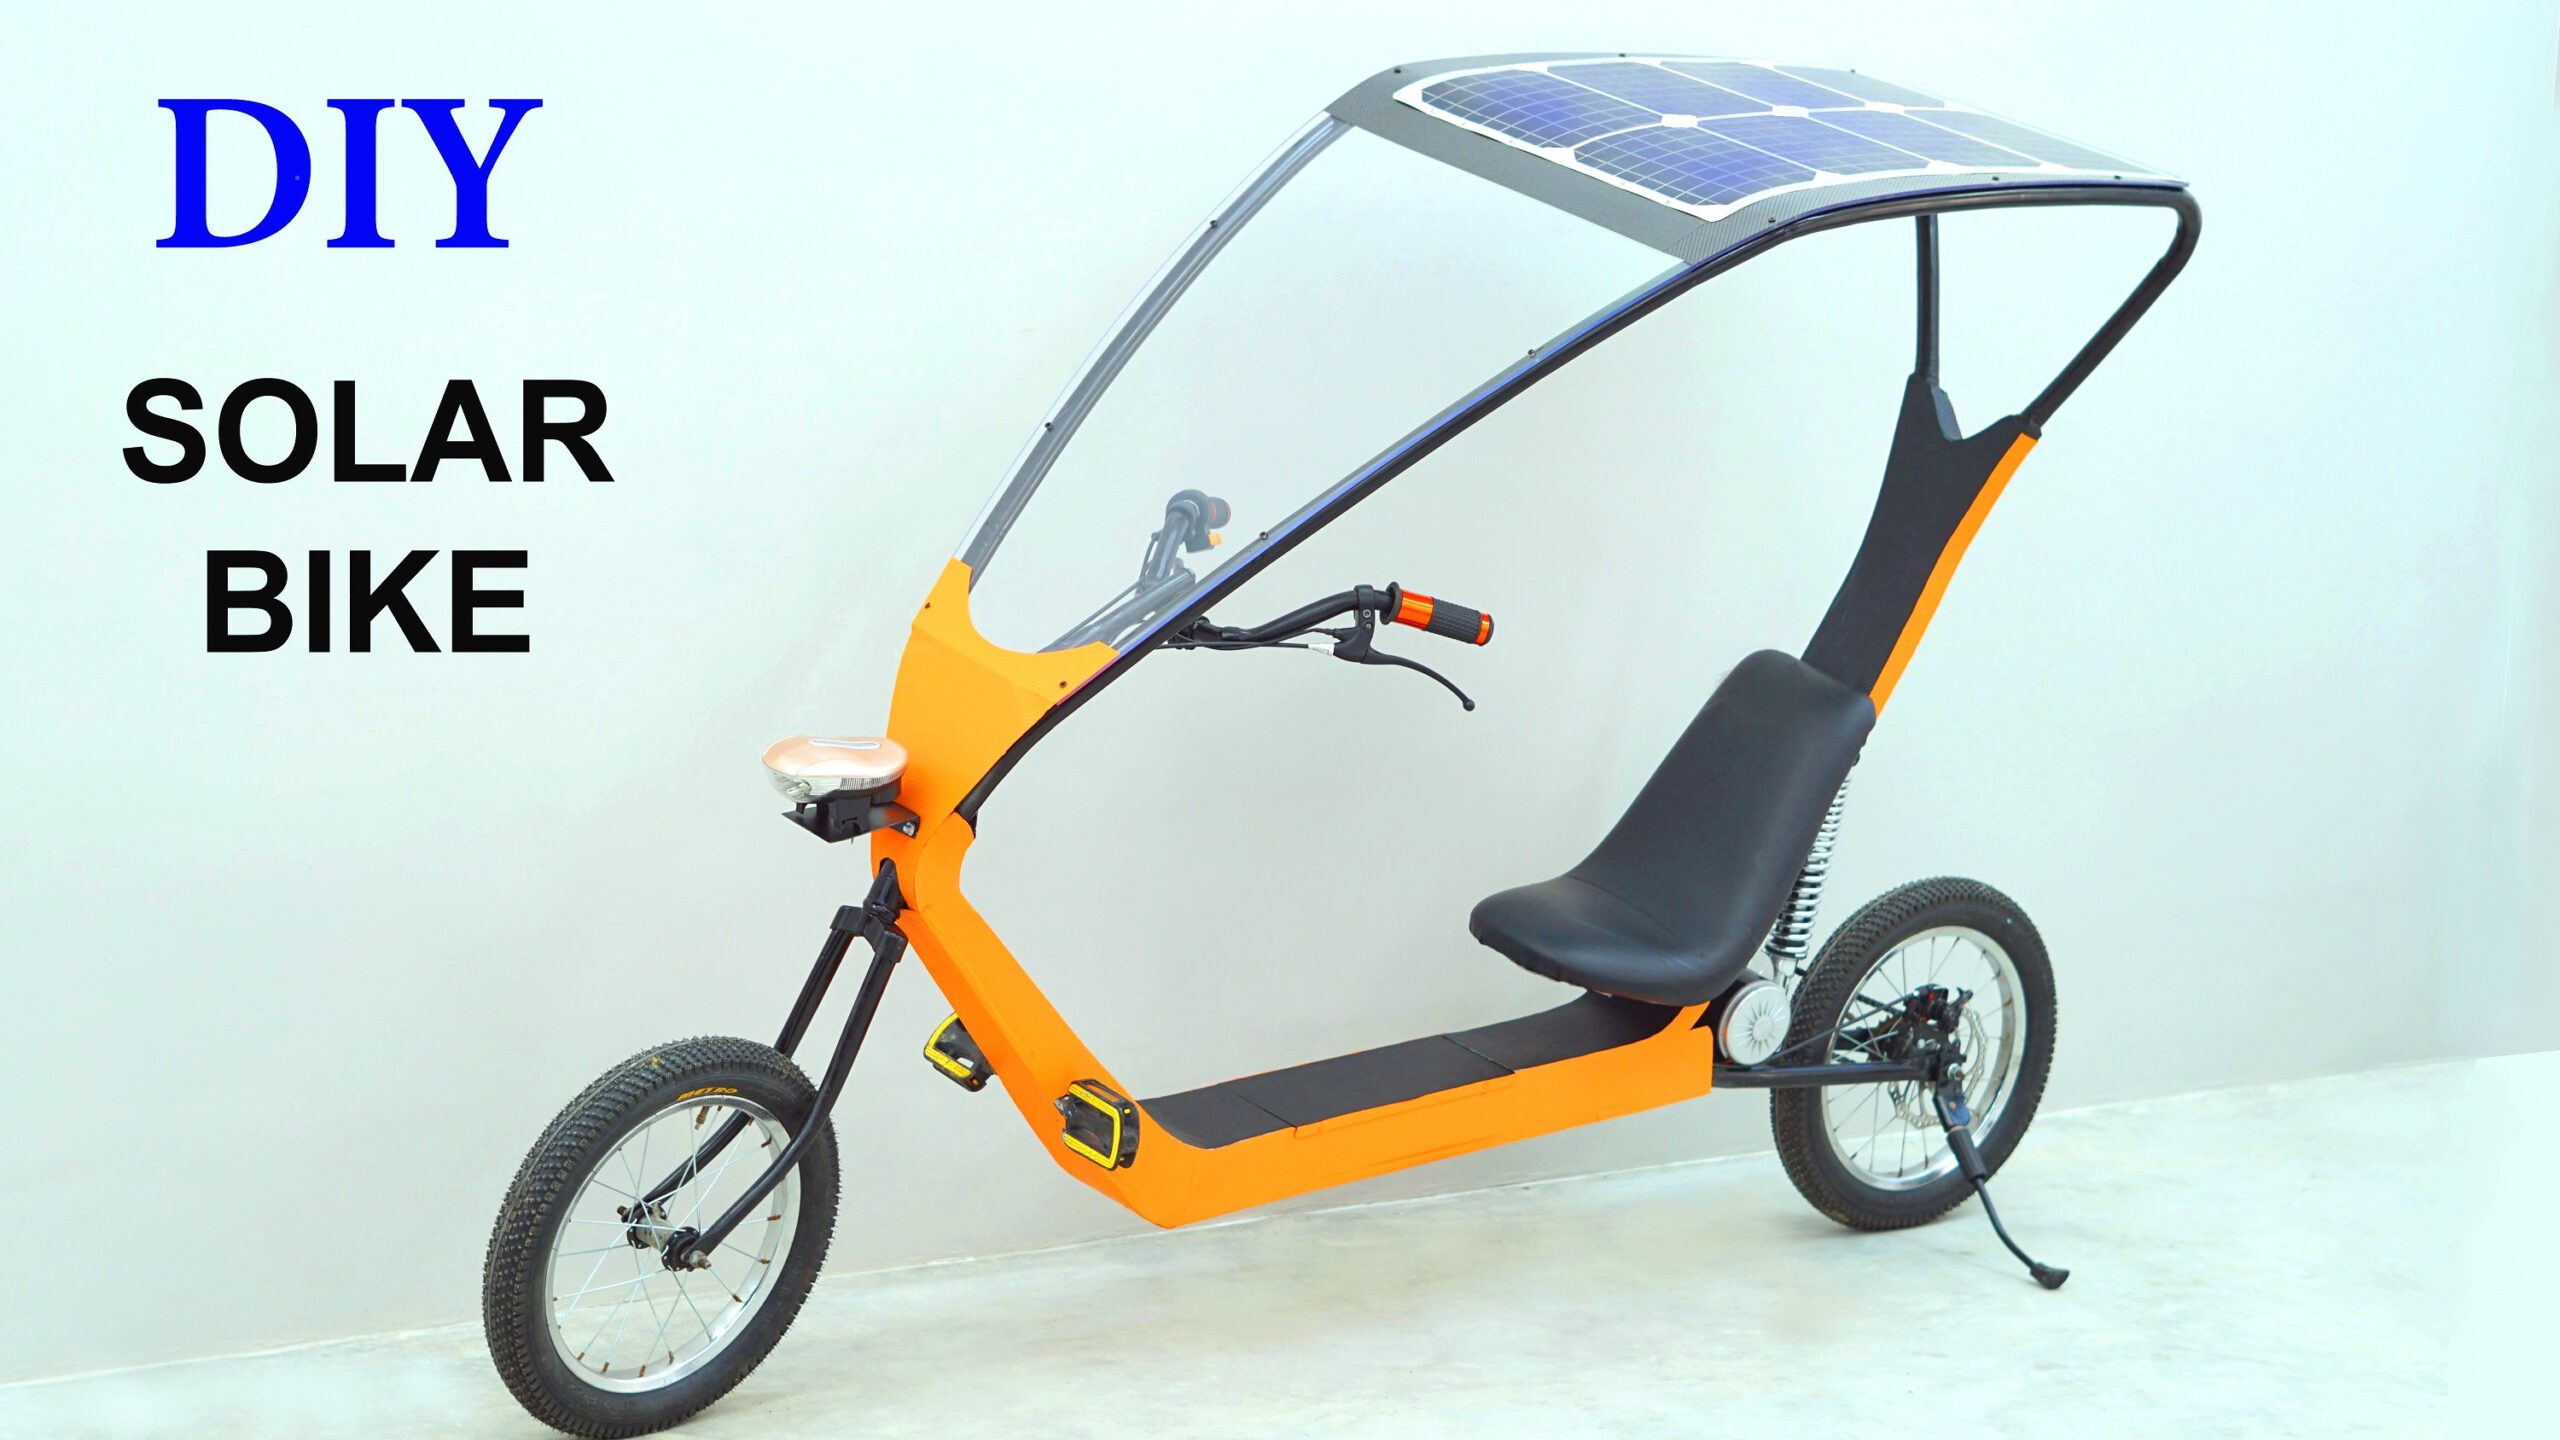

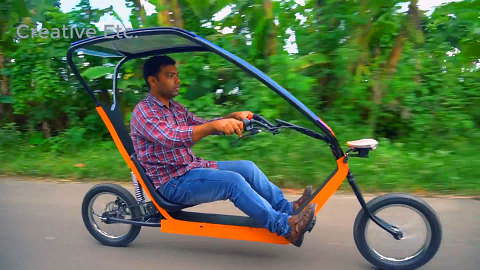
As petroleum fuel is an integral part of our daily life, it is continuously depleting. If it continues like this, it will run out one day in the near future. Assuming these things, scientists are discovering various free energy systems, such as solar energy. Just like electric bulbs, pumps, fans are run by utilizing solar energy, solar panels are now being used in several vehicles as well. The endless solar rays are captured by the solar panel and converted into electrical energy and stored in the battery, then it is sometimes given the form of light energy or kinetic energy as needed. Here I have made an electric bike that can be charged the battery through this solar panel. So that a lot of benefits will be available in daily life. Below is a detailed discussion about this vehicle.
Materials:
To make this bike some materials have to be bought from market and some materials from online. These issues are discussed in detail below…
Old Cycle:
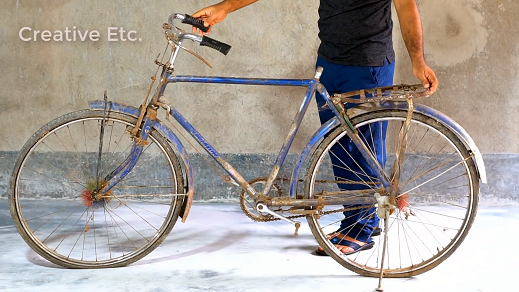
The most essential thing that I used to build this vehicle is a bicycle. If it is bought secondhand, it can be found at a much lower price. I bought an old bicycle here. You can also find old bicycles by looking around.
250 Watt Electric Bike Conversion Kit:
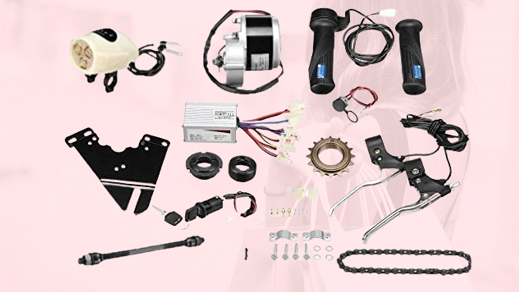
In this e-bike conversion kit, the motor, controller, throttle are all together. The conversion kit I used has a 250 watt motor. This motor can be run by 24 volts and the controller also 250 watts and 24 volts. Throttle is used to increase speed. It is fitted on the right side handle. If a hub motor is used instead of this motor, the efficiency will be much higher and it will be convenient in fitting. In this case, the cost will be a little more. The link to buy it online is given below….
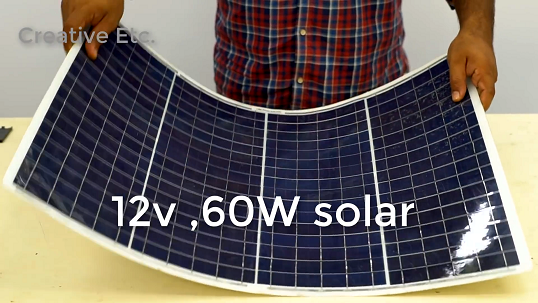
The solar panel provides 60 watt and 12 volt DC power. The reason I bought the flexible solar panel is because the top part where the panel will be mounted, if it is flexible, it will be more convenient to set it up, because it will need to be bent a bit.
12V to 35V Adjustable DC-DC Converter:
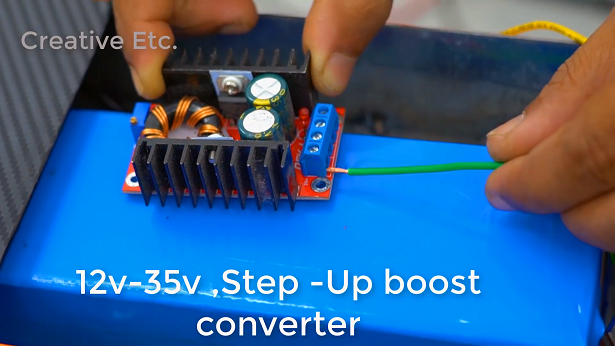
Since the solar panel provides 12 volt DC power, and the motor and controller are powered by 24 volt DC power, conversion from 12 volt to 24 volt is required. This adjustable converter is used for voltage conversion. These kits can be purchased online. Below is the link to buy online….
Wheel of Kid’s Cycle:
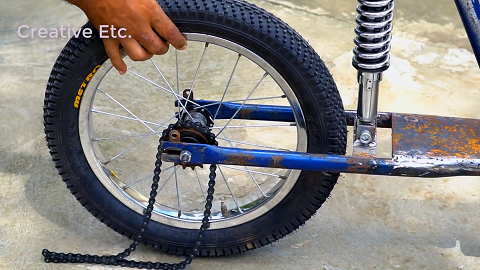
The wheels used in this E-bike are usually used in children’s bicycles. I used the smaller wheels, as these smaller wheels would be a better fit for this vehicle. These types of wheels are available for purchase at bicycle shops.
Battery:
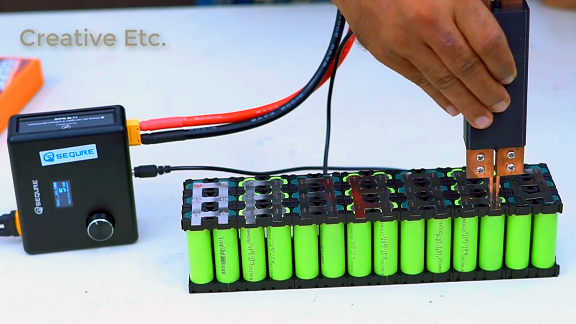
The battery used in this vehicle is made up of 42 lithium ion battery cells. Each of its batteries is 3.7 volts 2.5 Ah. The battery pack has 6 batteries in parallel connection. The battery pack is made by connecting seven such parallel packs in series connection. In this the ampere of the battery will be 6×2.5=15Ah and the voltage will be (7*4.2)= 29.4V since 4.2 is li-ion full voltage.
Acrylic Sheet:
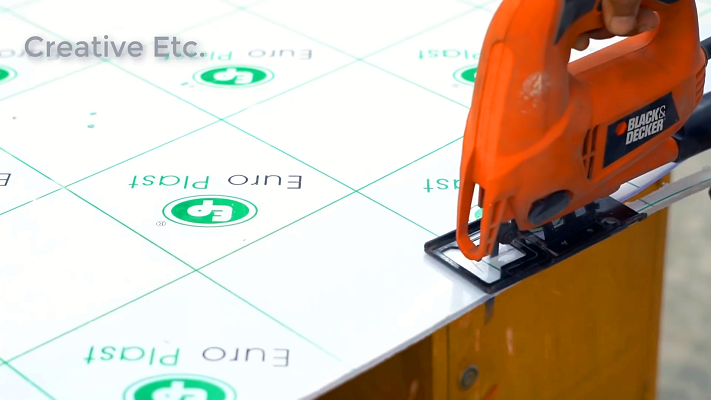
Acrylic seat is used in the front of this bike. It is available to buy in local market and online as Rs.50 per square feet. I need 10 square feet of acrylic sheet.
Disc Break:
At the rear wheel of the bike I used a disc brake which is available for purchase at bicycle shops.
How to Install Solar Panel:

The solar panel used here is a 12 volt 60 watt flexible solar panel. The shed that was made above, its shape is made according to the size of the solar panel, so that the panel is set to the right size. Since the solar panel outputs 12 volts and the battery pack is 29.4volts. For this, the voltage adjustable converter must be set to 29.4 volts by tuning.
Advantages and disadvantages of this design:
I have shared with you some advantages and disadvantages of this bike design. This design provides protection from the sun , which is not available in other bikes. Similarly, it does not get wet in the rain due to the shade above. In these cases, it is seen that many benefits are available in this model.
Despite these advantages, this model also has some disadvantages. Due to the weight of the shade centre of mass rise upwards and since its two wheels are quite small, due to this there is some problem in terms of balance. After running for a few days, however, the problem of balance is reduced. However, to get rid of this problem, the weight of the lower portion of the bike should be increased.
Speed and Mileage:
The maximum speed of this vehicle with 250 watt motor is 25-27 km per hour. And it can cover a distance of 30 km on a single charge in the absence of sunlight and can cover a distance of 45-50 km in the presence of sunlight.
Total Cost to Make The Vehicle:
I have already discussed that I had to buy quite a few materials to build this bike. The cost of purchasing these materials is discussed in detail below. I spent 400 rupees to buy the old bike. You can find similar bikes around for a little bit more. It cost me 5000 rupees to buy a 250 watt electric bike conversion kit online. 3000 rupees were spent to buy solar panels. 12v to 24v DC-DC converter online cost 400 rupees. 500 rupees were spent to buy 10 square feet acrylic sheet. It is available to buy in stores for Rs 50 per square foot. Prices will vary slightly by location. The site itself is built and cost Rs 300. A pair of wheels was bought for Rs.1500. By calculating these incidental expenses, it can be seen that a total of Rs. 17100 has been spent.
Charging time:
It takes 5 hours to charge the vehicle on solar and 3 hours to charge through the charger.
Materials and machine Buying Link:
250w E-bike conversion kit – https://amzn.to/3D4WrQ8
Flexible Solar Panel 60 W – https://amzn.to/3ipc25f
battery pack – https://amzn.to/2Y9T5MB
Front Disc Brake Set – https://amzn.to/3l2nMMJ
12V to 35V Adjustable DC-DC Converter: https://amzn.to/3ZkoMg8