Power cut is our daily problem. Sudden interruption of electricity supply often leads to problems. You have to fall behind in various tasks. In short, people’s life comes to a standstill during moments of no electricity. To solve these problems, people use generators or inverters. But the fuel consumption of this generator is high, and if the power supply is off for a long time, the inverter is discharged. If a solar inverter can be made at home to solve these problems, it is very convenient. Moreover, at the price of electricity, such solar inverters are very affordable. It reduces the cost a lot. I have made such a solar inverter at home. I had to gather quite a few materials to make it. In what method I have made this solar inverter, what materials are required to make it, I have discussed them in details below.Materials and Parts: The parts and materials I needed to make this solar inverter, and what I used, I have discussed below in details.
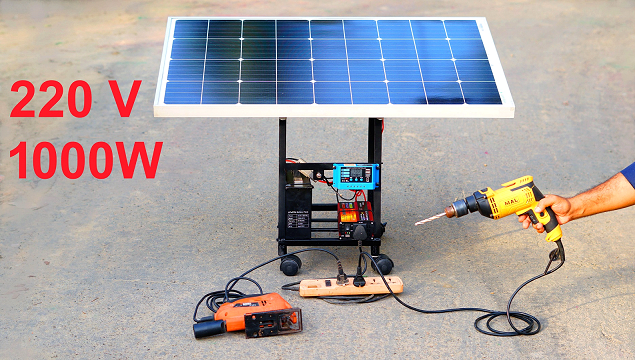
Solar Panels:
Solar panels are the most important to convert solar energy into electrical energy. It absorbs solar radiation and converts it into electrical energy. Silicon oxide is found in desert sands. This silicon oxide is mixed well with carbon. The mixture is then heated to 2000 degrees Celsius to produce silicon. If this silicon is doped with aluminum and phosphorus, electricity is generated from it. But this electricity does not flow normally. It requires sunlight. This electricity can flow by absorbing heat from sunlight. It is the method of generating electricity by solar panels. I used a solar panel from Loom Solar Company to make this inverter. I bought this solar panel from online for 8500 rupees. Online buying link given below.
Battery:
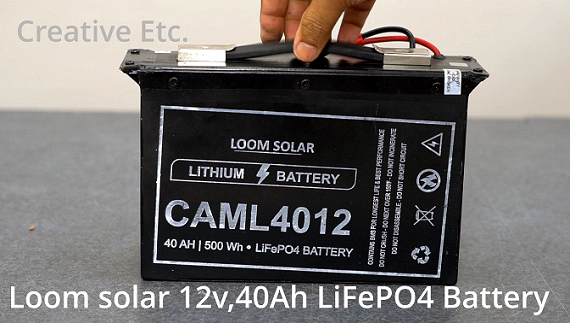
Electricity generated from solar panels can be used directly. But if there is no sunlight, or at night, electricity is not available from this solar panel. Batteries are needed to store electricity generated from sunlight during the day. The electricity held in the battery can be used as needed. I have used batteries from loom solar company to make the inverter. It is 12V and 40 amps. This lithium Fe-phosphate battery is 500 watts. Its fast charging formula fully charges the battery within 2-4 hours. And it has 3 years warranty. The cycle life of this battery is 2000. That is, it can be charged and discharged 2000 times. In this case, it can be said that even if it is charged once a day, it can be used safely for about 5.5 years. The price of this battery of loom solar company is 15000 rupees. I bought it online. The battery is available in the local market. Online buying link given below.
Inverter:
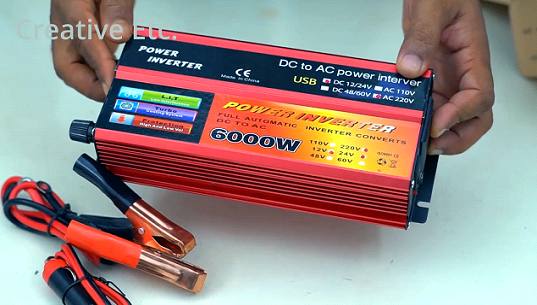
Inverter is required to convert DC electricity to AC electricity. I have used Layfuz company power inverter in this case. It converts power from DC 12V to AC 220 volts. This 3000 watt inverter has three total power outlets. and two USB ports. These inverters are available to buy in local markets and online. I bought it online. Online buying link given below.
12 V solar charge controller:
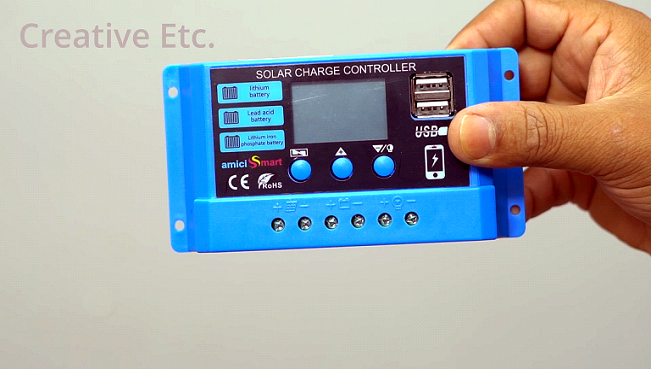
When the battery and solar panel are connected, this controller charges the battery. An LCD display is provided on the controller. It shows the charging status. When overload, short circuit, open circuit, reverse protection occurs, this controller protects the battery power, and does not allow the battery life to decrease. This controller is suitable for all types of batteries. Before using the controller, it must be verified that the voltage of the battery and the solar panel are the same. Before installation, connect the controller with the battery, then connect the solar panel.
Switch:
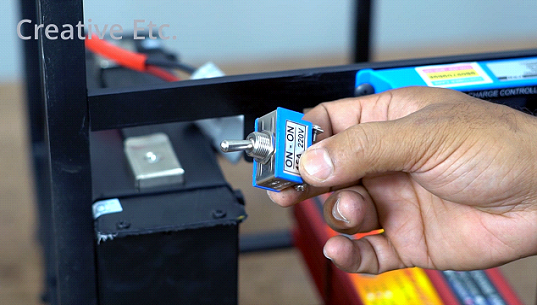
To turn the system on/off I used a high ampere switch on this inverter which I bought from local market for Rs.50.
Iron Pipe & Iron Rod:
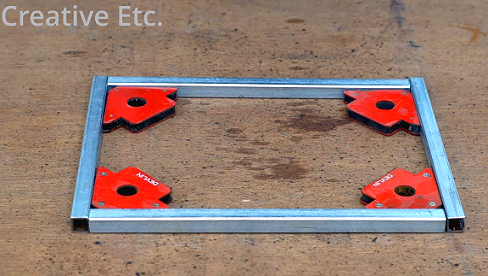
Here I have used iron pipe and iron rod to make the structure of the inverter. These iron pipe and iron rod are available to buy in local market. I bought iron pipe and rod as Rs.100 per kg. In this case I required a total of 5 kg of iron pipe and rod.
Wheel:
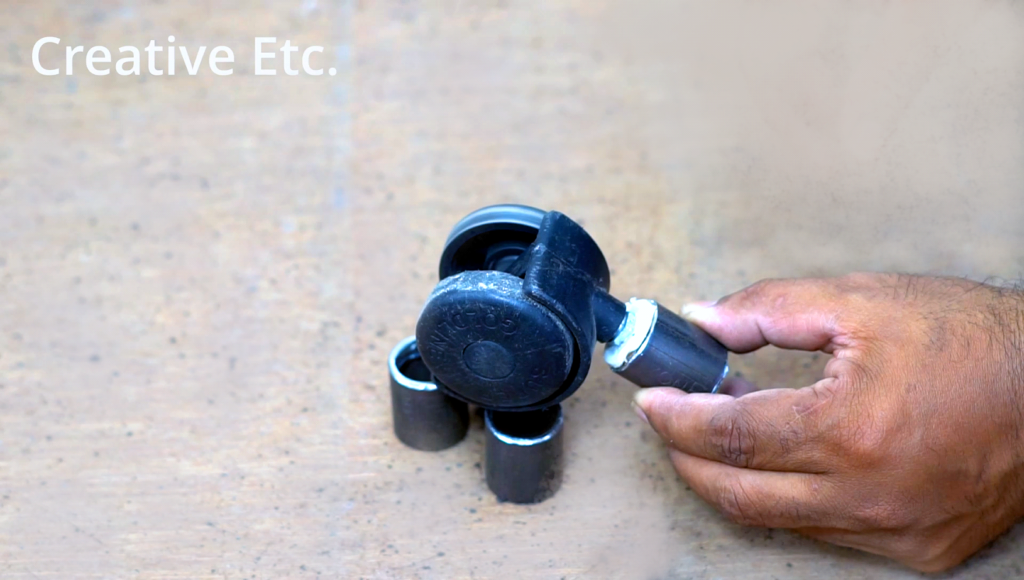
Due to the heavy weight of this inverter, it will be difficult to carry. That’s why I fit wheels under it so that it can be easily moved from one place to another. In this case, I used the wheels of an old trolley bag.
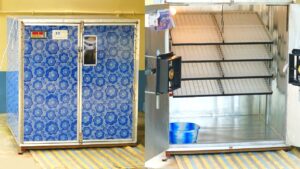
How to Make:
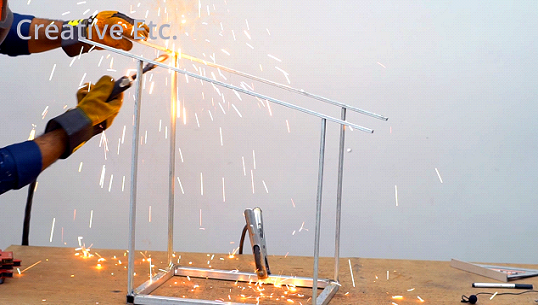
First, I cut four rectangular iron pipes to the specified size, and welded them together to form the lower part of the structure. Then I cut the rectangular iron rod into eight pieces to make the upper parts. I made the full structure by connecting these rods correctly with the lower part. So that the structure can be easily moved from one place to another, I fit four wheels under it. I set the solar panel in the upper portion in such a way that if it is placed in the sun, the sunlight can fall on it completely. I set the controller, inverter, battery at a specific place inside the structure. Then I connect a switch to turn the system on and off. I connected all the devices one by one through wire. After connecting the devices first, connect the solar panel.
Total Cost to Make The Inverter: I
I spent quite a lot of money to make this solar inverter.
8500 rupees were spent to buy the solar panel.
The price of the battery is 15000 rupees.
The price of the inverter is 4092 rupees.
The price of solar charge controller is Rs. 999.
iron-rod, iron-pipe and other expenses Rs.1000.
Counting all the costs, it appears that I have spent a total of 29591 rupees to make this inverter.
Advantage & Disadvantage:
Solar inverters cost quite a bit of money during installation, but after installation it reduces the electricity consumption to zero. Starting from lights, fans all types of home electronic devices can be operated through this. Many large government and private projects also use high-capacity solar-inverters to reduce electricity consumption.