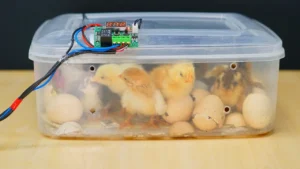
Poultry farming occupies an important place in business. Chicken meat and eggs are given special importance in our daily diet. Poultry meat and eggs are essential in maintaining nutritional balance. The demand for eggs and meat is increasing with population growth. Poultry farming is required on a large scale to meet this demand. And the most important thing in this farming is the production of quality healthy chicks. Hatching a large number of chicken eggs requires a high-quality egg incubator capable of hatching a large number of eggs. Because a hen cannot hatch a large number of chicks at once. But, 2000 to 3000 or more eggs can be hatched simultaneously in an incubator. If you buy good quality incubators from the market, the price will drop. In this case, if the incubator can be made properly at home, then the cost is much less. I have built such an incubator. What materials are required to make this incubator, how it is made and its management method has been discussed in detail below.
Materials & Parts:
I had to collect several parts and materials to make this incubator. Each of these parts is essential in building the incubator. I bought some parts from a local market and some parts online. Below I have discussed in detail what the functions of the parts are, how to control them, and where I bought these parts from.
Controller:
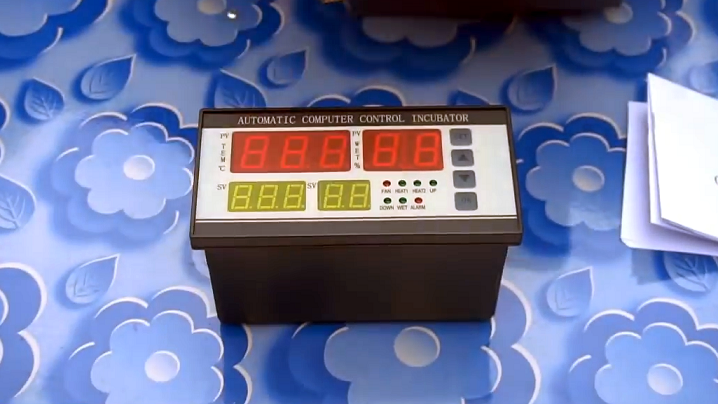
The controller is the most important part of the egg incubator. This controller controls the temperature and humidity required for hatching eggs. I used xm-18 controller from xcluma company. I purchased it online for Rs 4000. Below is the link to buy online.
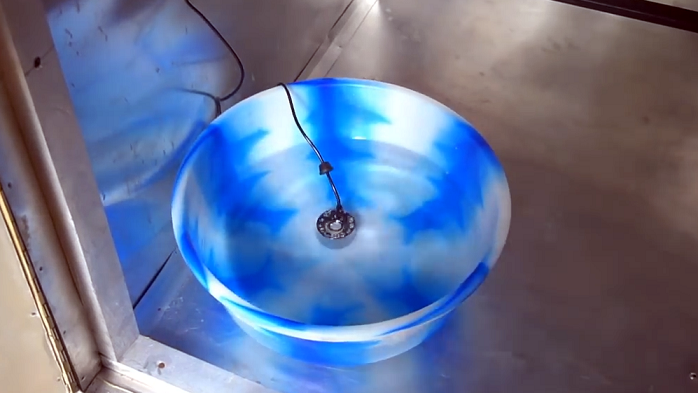
Humidifier:

In the case of egg hatching, it is necessary to have a certain level of humidity inside the incubator. Humidifiers do the job of creating this humidity. It turns water into steam, but the controller determines how much humidity needs to be created inside the incubator.
Heating Coil:

Temperature is the most important factor in egg hatching. The temperature controller controls this properly, but the heating coil is required to produce heat. I have used the heating coil of the soldering iron as the heat source here. I purchased this from a local electronics store. In this case, I needed two heating coils, which I bought for 500 rupees.
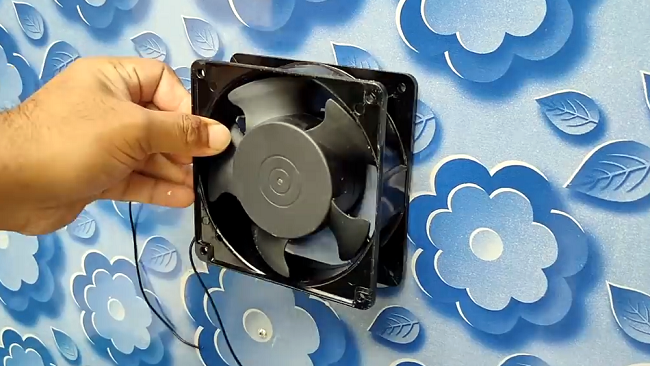
Blower Fan:
A blower fan is required to spread the heat generated by the heating coil evenly. I have used two 9.5-inch fans from the Usha company here. Which I bought online for 1450 rupees.
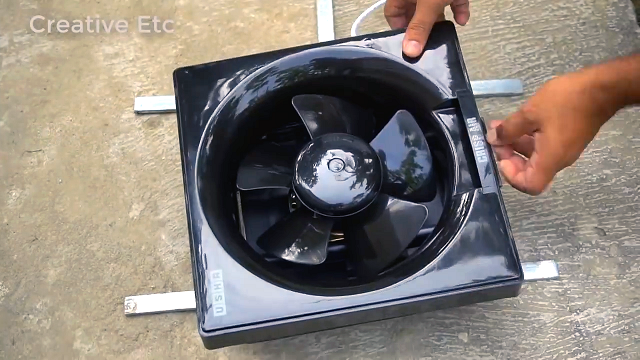
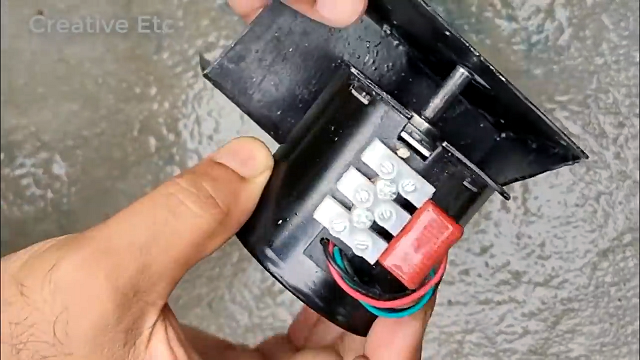
Exhaust Fan for Ventilation:
Because the incubator chamber is completely enclosed, it can lack oxygen inside, so a fan is needed to circulate the air inside and outside. I have used one such exhaust fan here, which is provided by Usha Company. I bought it online for Rs. 900.
Turner Motor:
In the case of egg hatching, it is necessary to turn the egg from one side to the other, otherwise, the hatching rate comes down a lot. This turning is done with the help of a turner motor. I have collected this turning motor online. It is a 220v – 14w gear motor, which turns 2.5 times per minute. The price of this motor from Xcluma company is Rs. 1359. The link to buy online is given below.
Egg Tray:
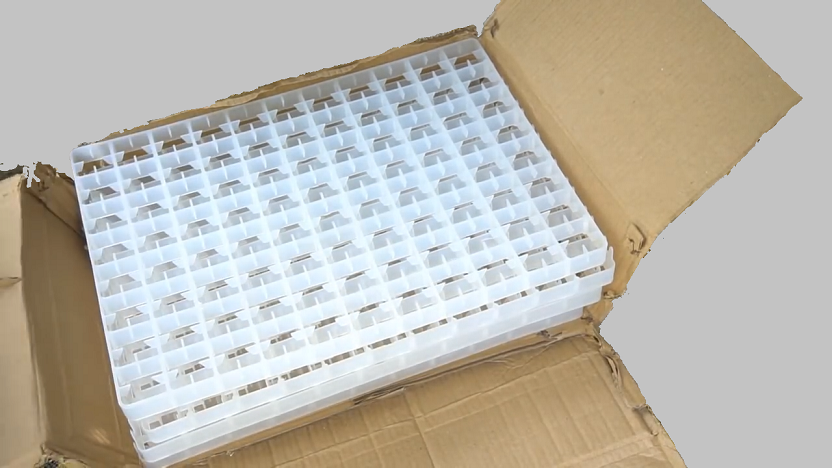
A tray is required to arrange the eggs in the chamber of the incubator. Separate trays are available for purchase for duck, chicken, or other bird eggs. I have used a tray here, which can accommodate all types of eggs. Such trays are available to buy online. I purchased 10 such trays online at a price of Rs.3599. The link to buy online is given below
Chamber:
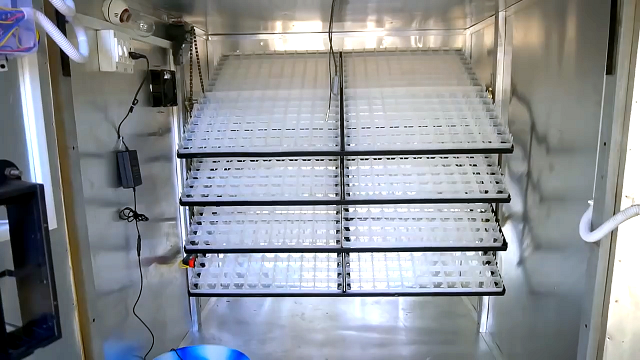
The incubator chamber is homemade and structured with plywood. This chamber wall has three layers. A type of sheet, like Sunmica, is used on the outer side of the chamber, and the middle layer is provided with thermocol. Since aluminum is a good conductor of heat. aluminum sheets are used in the inner layer. By using thermocol in the middle of the wall, the heat inside will not come out and if you use an aluminum sheet on the inner side, it will try to keep the same temperature everywhere inside. It cost me 6000 rupees to make such a chamber. I bought plywood, thermocol, and aluminum sheet from the local market.
Hatching Basket:
2 days before the eggs hatch, the turning should be stopped and the eggs should be removed from the tray and arranged inside a basket. It facilitates the hatching of chicks. Such baskets are available for purchase in local markets. Prices may vary slightly by location.
Water pot:
The humidifier is immersed in a container filled with water. This allows the humidifier to generate the required steam from this water. The larger the range of the pot, the more steam can be produced. Such a pot can be
Limit Switch:

The Turner motor is connected to egg trays by a chain. This limit switch is connected to the motor. which is required to turn the motor on and off at the right time. The switch is installed at a point where the trays are pressed once on the limit switch to take turns. As a result, the motor stops and the motor starts again according to the time interval pre-instructed to the controller. I bought this type of limit switch online.
How to Make:
First, we made the incubator chamber and egg tray racks. Then we set these racks in the chamber. Then one by one we set the controller, humidifier, heating coil, blower fan, exhaust fan, turner motor, and limit switch at a specific place. I connected the Turner motor with the rack through a chain and set the trays on the rack. Then the parts that will be controlled by the controller, I connected them with the controller.
Dimension:
The incubator I made is 4 feet long, 4 feet wide, and 4 feet high.
The function of the Controller:
The controller is the most important part of the incubator. It performs various functions. Its function is discussed below…
⦁ Egg hatching requires a certain temperature. The controller controls this temperature. When the heating temperature drops, the controller turns the heating coil on and turns the heating coil off when that temperature is reached. Thus the chamber is kept at a fixed temperature.
⦁ It is very important to have the right level of humidity as well as the temperature inside the machine. When the humidity drops, the humidifier turns on through the controller and turns off when the humidity reaches the right level.
⦁ The function of the controller is to rotate the exhaust fan once at certain intervals.
⦁ A special function of the controller is to rotate the turner motor once at a specified time.
Factors affecting hatchability:
Egg hatching requires some precautions. Otherwise, the hatchability is greatly reduced. I have discussed these points to get proper hatching.
⦁ Temperature: Keeping the incubator temperature at a certain level is very important for hatching. The optimum temperature in the chamber is 37.8 degrees Celsius. Temperature variations may occur for heating systems. But care should be taken, the temperature is not less than 37 degrees and not more than 38.8 degrees Celsius. If it is less than 37 degrees, there may be problems in the growth of the fetus and if it is more than 38.8 degrees, there is a possibility of death of the fetus.
⦁ Humidity: Humidity plays an important role in egg hatching in the incubator. For hen humidity in the incubator, the chamber should be kept at 50% to 55% from day 1 to 17, and the humidity should be increased to 70% from day 18 to 21. If the humidity is right it is very good and the baby comes out very well.
⦁ Turn the Egg: It is very important to turn the eggs every 4 to 5 hours. Here I turned the egg every 2 hours. It depends on the angle of the rotation of the egg tray. If you do not turn the eggs, the embryo gets stuck on one side of the egg in the membrane like the glue of the shell. It causes problems in its growth, and it is difficult for the eggs to hatch.
⦁ Ventilation: The embryo inside the egg needs oxygen to survive. The oxygen enters through the small holes on the eggshell. If there is a lack of oxygen inside the incubator, the embryo inside the egg dies. As there are many eggs side by side in the incubator. For each egg embryo to get enough oxygen, it is necessary to remove the carbon dioxide from the inside through the ventilation system and bring in fresh air from the outside. Care must be taken to ventilate as much as is necessary, otherwise, excess ventilation may reduce the internal humidity, causing the hatchlings to dry out and stick to the eggshell during hatching and may die before hatching. As a result, the eggs will not hatch.
⦁ Infertile eggs should not be given to hatching.
⦁ Healthy and strong parent chicken eggs should be collected for hatching.
⦁ Rotten eggs will not produce good results for hatching.
⦁ Eggs should not be stored in damp places